+-+blog+graphic.jpg)
I know today is April Fools day but this is no joke.
Love this card and I made you a picture tutorial so you can make one too!

I saw a card like this a couple weeks ago with a butterfly off the top of the card and just had to give it a try. Not sure what this technique is called or if it is even called anything but I am calling it the Framelit Cut-away card.
Here is how I did mine:
Cut a piece of cardstock 4-1/4" x 9". I used Whisper White Thick Cardstock.
Lightly draw pencil lines (these will later be erased) at 4-1/2" and 5-1/2" from one edge.

You will used these as guides for placing your framelit.
For this sample I used the Bold Butterfly Framelit.

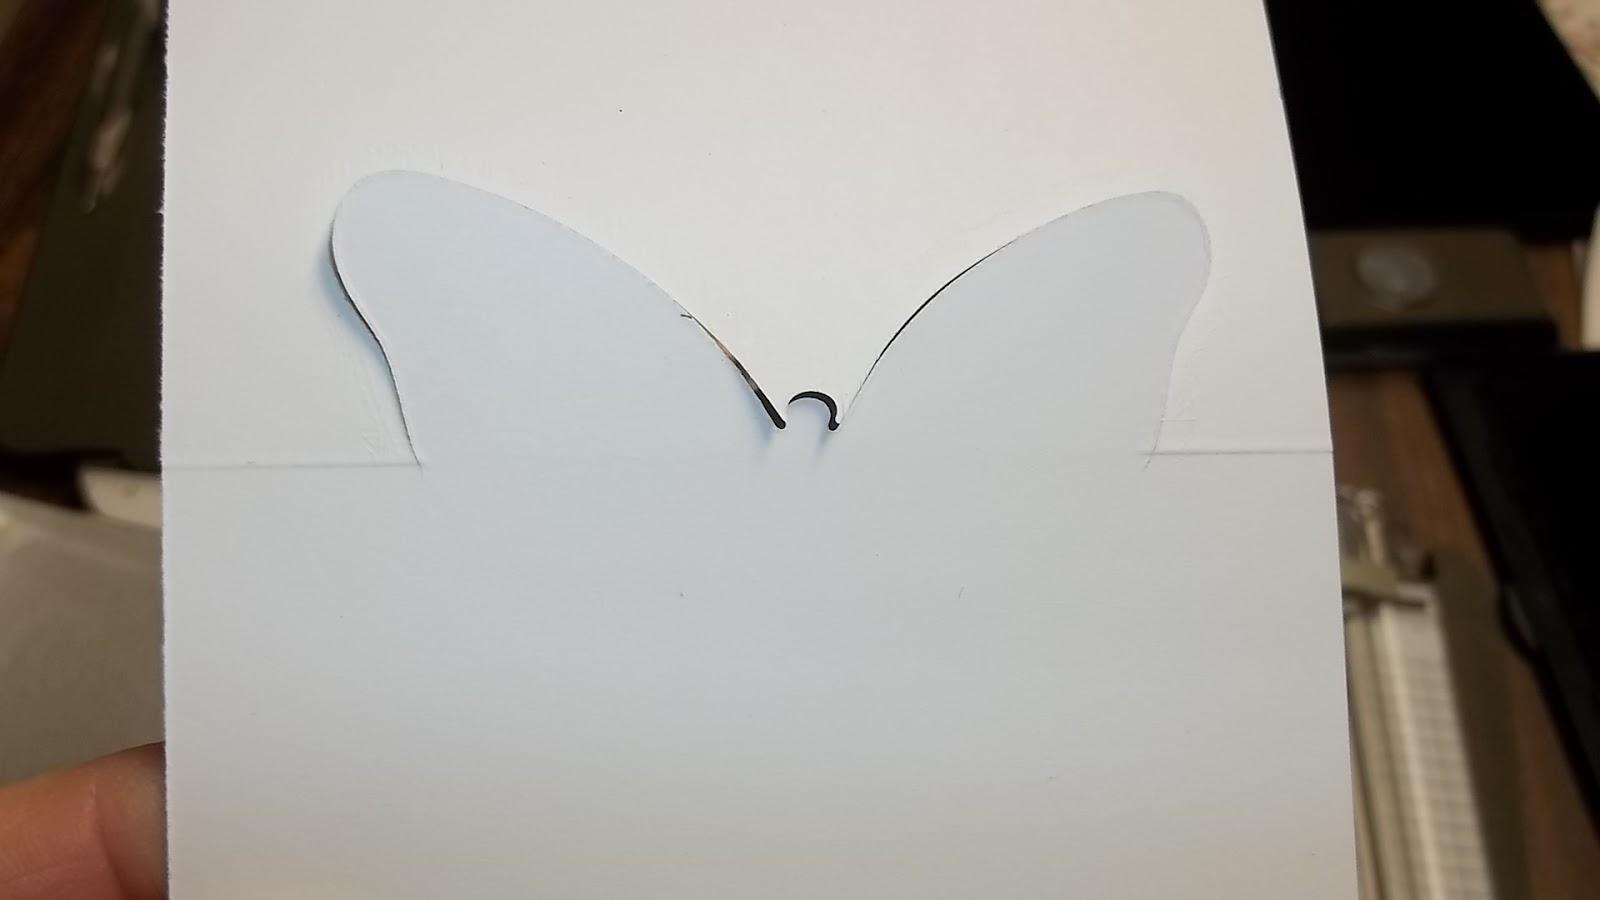
Place the top of the framelit close to the 5-1/2" mark and remember that the cutting edge of the framelit is close to the inside of the framelit. Position it first so you can see the 5-1/2" pencil line and then move it down a hair so you cannot see the line.

Now to cut out your framelit use your Big Shot with the Magnetic Platform, cutting pad, paper, framelit and top cutting pad. Place the top cutting pad over the top of the framelit with the edge at the 4-1/2" mark and then run it though the machine.

After cutting it will look like the above picture.
You can now erase the pencil marks and then add score lines from the edges of the card into the bottom of the cut wing.
Thus the name of the card...Framelit Cut-Away...because the top of the framelit is cut away from the back of the card.
When you fold your card on the score lines it will measure 4-1/4" x 5-1/2", just a normal size card, no special envelope needed.
I used the Watercolor Wings stamp set to stamp these cards.
After stamping the images I added the coordinating cut out of the butterfly in black using the Butterflies Thinlits die and the Bold Butterfly Framelits.
I lightly bent the wings up and only applied some adhesive on the body of the butterfly die.


Have fun making these cards!
I have more to share so check back.
Happy Stampin'-
DeAnn


Thank you for sharing this. I've always wondered how it was done!
ReplyDeleteYour cards are beautiful. Thank you for the tutorial too.
ReplyDelete